Publishing a set of folders and reports

The final security requirements for this tutorial are related to the Sales group and its subgroups. They require a hierarchy of folders containing worldwide reports, regional reports, and management reports.

Because this tutorial sets up a system of decreasing rights, you will first create a set of folders that places the most general content at the top of the directory tree. In this case, all Sales staff can view the worldwide reports, so the folder for those reports requires the lowest level of security. The regional reports will go in subfolders that are accessible only to users who belong to the appropriate regional Sales group. The management reports will be located in subfolders of each of the regional folders.

You could create this set of folders using the CMC, as in the earlier sections of this tutorial. However, if you already have a set of reports, the Crystal Publishing Wizard provides the quickest way to add content and create folders at the same time.

To create a set of folders while publishing reports
  1. On your local hard drive, create a set of folders that correspond to the folders you want to add to Crystal Enterprise.

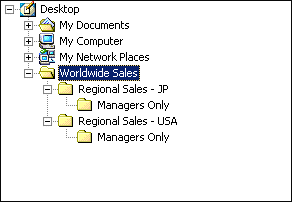
    For this tutorial, the Sales folders are named and arranged hierarchically as follows:

  2. Arrange your reports (.rpt files) in the new folders on your local hard drive.

    If you do not have any of your own reports, use some of the sample reports included with Crystal Enterprise. The sample reports are typically installed to C:\Program Files\Crystal Decisions\Enterprise\Samples\<language>\Reports (replace <language> with en, de, fr, or jp, depending upon your version of Crystal Enterprise).

    Note:    To complete this procedure, you must place at least one report file in each of the folders that you have created on your local hard drive. Otherwise, the Crystal Publishing Wizard will not create the appropriate directories on the Crystal Enterprise system.

  3. From the Crystal Enterprise Programs group, start the Crystal Publishing Wizard and, when it appears, click Next.
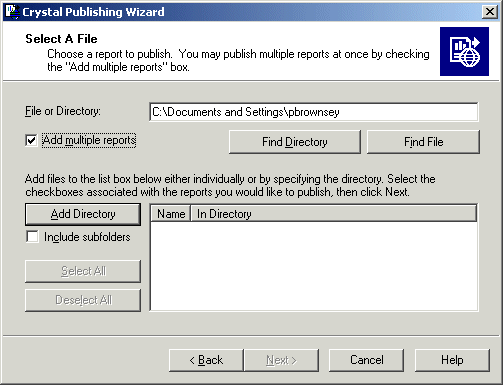
  4. In the Select A File dialog box, select the Add multiple reports check box to view the entire set of options.

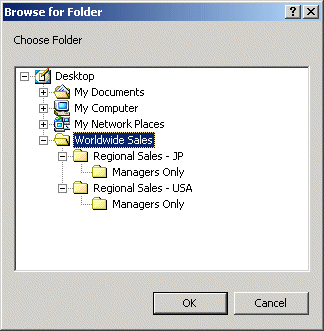
  5. Click Find Directory to access the Browse for Folder dialog box.

  6. Select the top level Worldwide Sales folder that you created on your local hard drive, and click OK.

    You are returned to the Select A File dialog box.

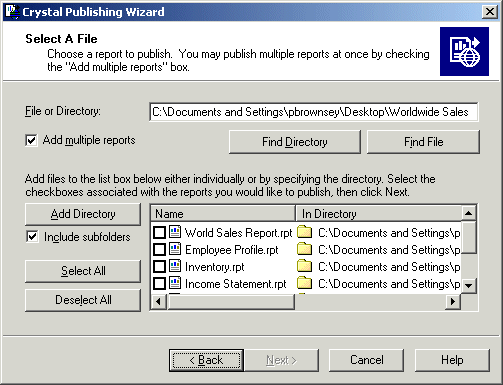
  7. Select the Include subfolders check box, and then click Add Directory.

    All of the reports are added to the list.

  8. Click Select All and then click Next.

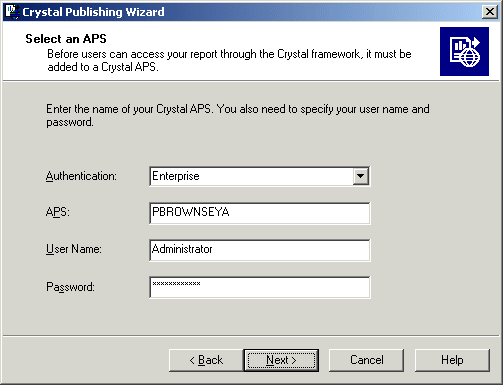
    The Select an APS dialog box appears.

  9. Log on to the appropriate Crystal Enterprise APS with your administrative credentials; then click Next.

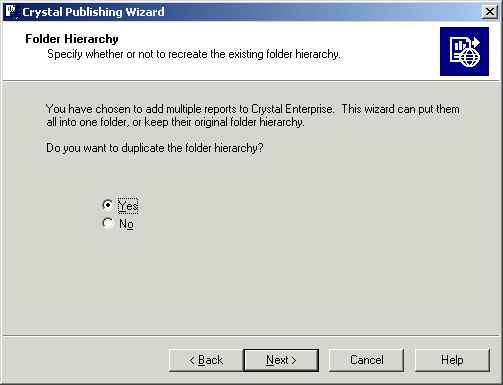
    The Folder Hierarchy dialog box appears.

  10. Select Yes to duplicate the local folder hierarchy on the Crystal Enterprise system; then click Next.
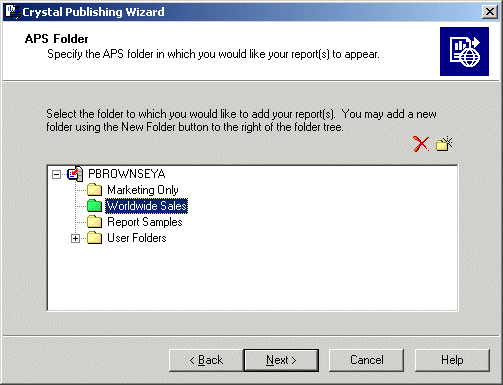
  11. In the APS folder dialog box, click New Folder.
  12. Name the folder Worldwide Sales and ensure that it is located at the top of the directory tree, as shown here:

  13. Click Next.

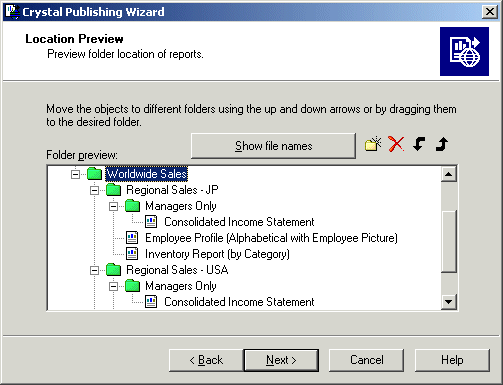
    The Location Preview dialog box appears. You can see here that the Regional Sales folders will be created below the Worldwide Sales folder, and the Managers Only folders will be created as additional subfolders. The actual report files are arranged in the appropriate folders.

  14. Click Next.
  15. Proceed through the rest of the Crystal Publishing Wizard and make any desired changes to your reports.

    Tip:    If you are publishing sample reports for the purpose of this tutorial, click Next to accept all the default values. For more information on the rest of the Crystal Publishing Wizard, see Publishing with the Crystal Publishing Wizard.

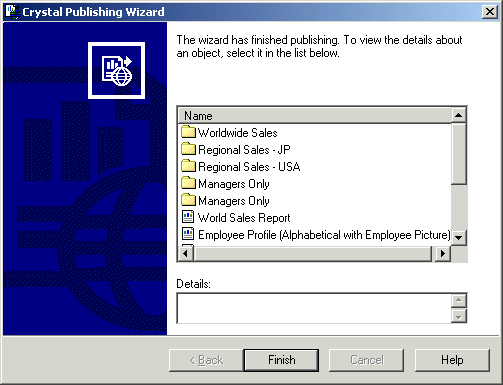
    When the Crystal Publishing Wizard has added the reports and folders to the system, it displays a summary:

  16. Click Finish to close the Crystal Publishing Wizard.

    You are now ready to set each Sales group's object rights for the new set of Sales folders.
Related topics


Crystal Decisions, Inc.
http://www.crystaldecisions.com
Support services:
http://support.crystaldecisions.com