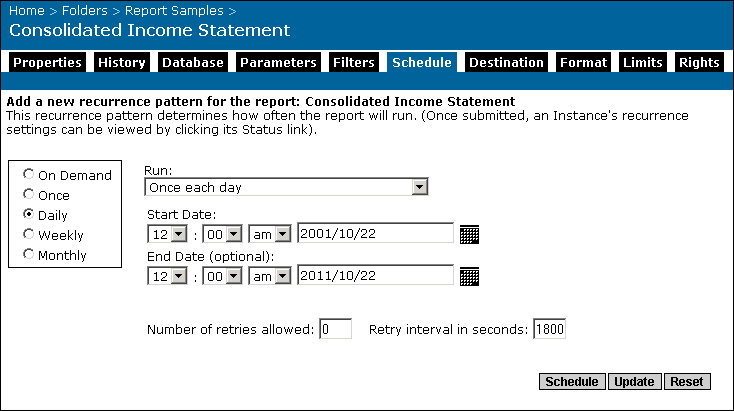
- Once each day
The report will be run once a day, and will begin on the day and time that you specify in the Start Date area. You can also select an optional end date for the report in the End Date area. To select a date, you can either enter a date in the date field, or click the Popup Calendar button to select a date from the calendar that appears in a separate window.
- Daily, with events
Choose this option to use the event or events that you have already defined. The report will be run once a day, and will begin on the day and time that you specify in the Start Date area. You can also select an optional end date for the report in the End Date area. To select a date, you can either enter a date in the date field, or click the Popup Calendar button to select a date from the calendar that appears in a separate window.
- Every X hour(s), N minute(s)
For this option, the report will be run every X hour(s) and N minute(s), and will start on the day and time that you enter in the Start Date area. You can also select an optional end date for the report in the End Date area. To select a date, you can either enter a date in the date field, or click the Popup Calendar button to select a date from the calendar that appears in a separate window. To specify the hour and minute values, enter numeric values in the "Where X is" field and the "Where N is" field. By default, X equals 1 and N equals 0.
- Every X hour(s), N minute(s), with events
Choose this option to use the event or events that you have already defined. For this option, the report will be run every X hour(s) and N minute(s), and will start on the day and time that you enter in the Start Date area. You can also select an optional end date for the report in the End Date area. To select a date, you can either enter a date in the date field, or click the Popup Calendar button to select a date from the calendar that appears in a separate window. To specify the hour and minute values, enter numeric values in the "Where X is" field and the "Where N is" field. By default, X equals 1 and N equals 0.
- Every X day(s)
For this option, the report will be run every X day(s) and will start from the start date and time that you enter in the Start Date area. You can also select an optional end date for the report in the End Date area. To select a date, you can either enter a date in the date field, or click the Popup Calendar button to select a date from the calendar that appears in a separate window. To specify the day value, enter a numeric value in the "Where X is" field. By default, X has a value of 1.
- Every X day(s), with events
Choose this option to use the event or events that you have already defined. For this option, the report will be run every X day(s) and will start from the start date and time that you enter in the Start Date area. You can also select an optional end date for the report in the End Date area. To select a date, you can either enter a date in the date field, or click the Popup Calendar button to select a date from the calendar that appears in a separate window. To specify the day value, enter a numeric value in the "Where X is" field. By default, X has a value of 1.
- Number of retries allowed
This number indicates the number of times a job server will attempt to process a report if the first attempt is not successful. By default, the number is zero.
- Retry interval in seconds
Crystal Enterprise will wait for the specified number of seconds to pass before attempting to process a report again (if the first attempt failed). The default setting is 1800 seconds.
